


No products in the cart.
Bell tents
A Comprehensive Guide on Setting Up and Folding a Bell Tent

23
May
May
Whether you’re an avid camper or planning your first adventure, a bell tent can be an excellent choice for a comfortable and versatile outdoor accommodation. This article provides a detailed, step-by-step guide on how to set up and fold a bell tent, ensuring a smooth camping experience.
Setting Up a Bell Tent
The process of setting up a bell tent may seem complex initially, but it is surprisingly simple with a little practice. You’ll need a hammer and optionally, a friend to make the process more fun.
Step 1: Select and Prep Your Tent Site
The first step in setting up your bell tent is to select a suitable site. Look for a flat, dry space that is clear of any debris such as sticks and stones. Avoid areas where water drains or where trees might drop sap or bird droppings onto the canvas.
Step 2: Lay Down a Ground Tarp

Next, lay down a ground tarp to create an additional barrier between your tent and the ground. This can prolong the life of your tent and speed up the takedown process by keeping mud and moisture off the canvas.
Step 3: Unpack and Unfold the Bell Tent

Carry the bell tent bag to the center of the tarp and unfold the tent onto it, making sure the tent entrance faces the direction you desire.
Step 4: Peg the Groundsheet Floor

Secure the tent by pegging the groundsheet floor at a 45-degree angle, starting with three pegs beneath the door. Ensure to pull the groundsheet tight as you peg to eliminate any wrinkles inside the tent.
Step 5: Install the Center Pole

Assemble the center pole outside the tent, then take it inside and attach it to the center cone of the tent roof. Position the bottom of the pole at the center of the floor.
Step 6: Install the Doors A-Frame Pole
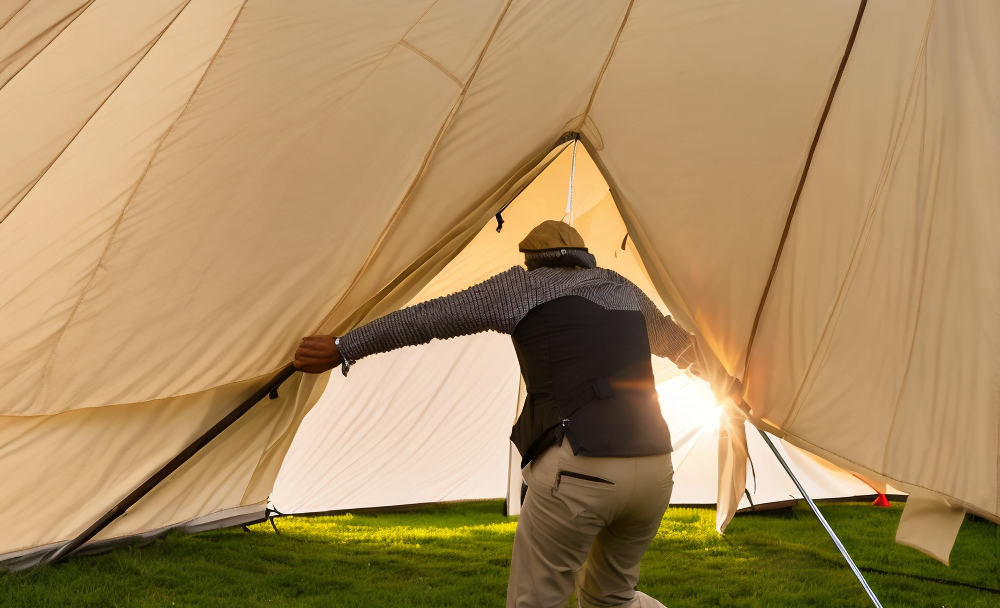
Assemble the A-frame pole inside the tent and place the metal spike at the top through the matching grommet hole above the door. Secure the“`html
pole by positioning the feet of the pole into the “pockets” on the floor.
Step 7: Stake the Guy Line Ropes
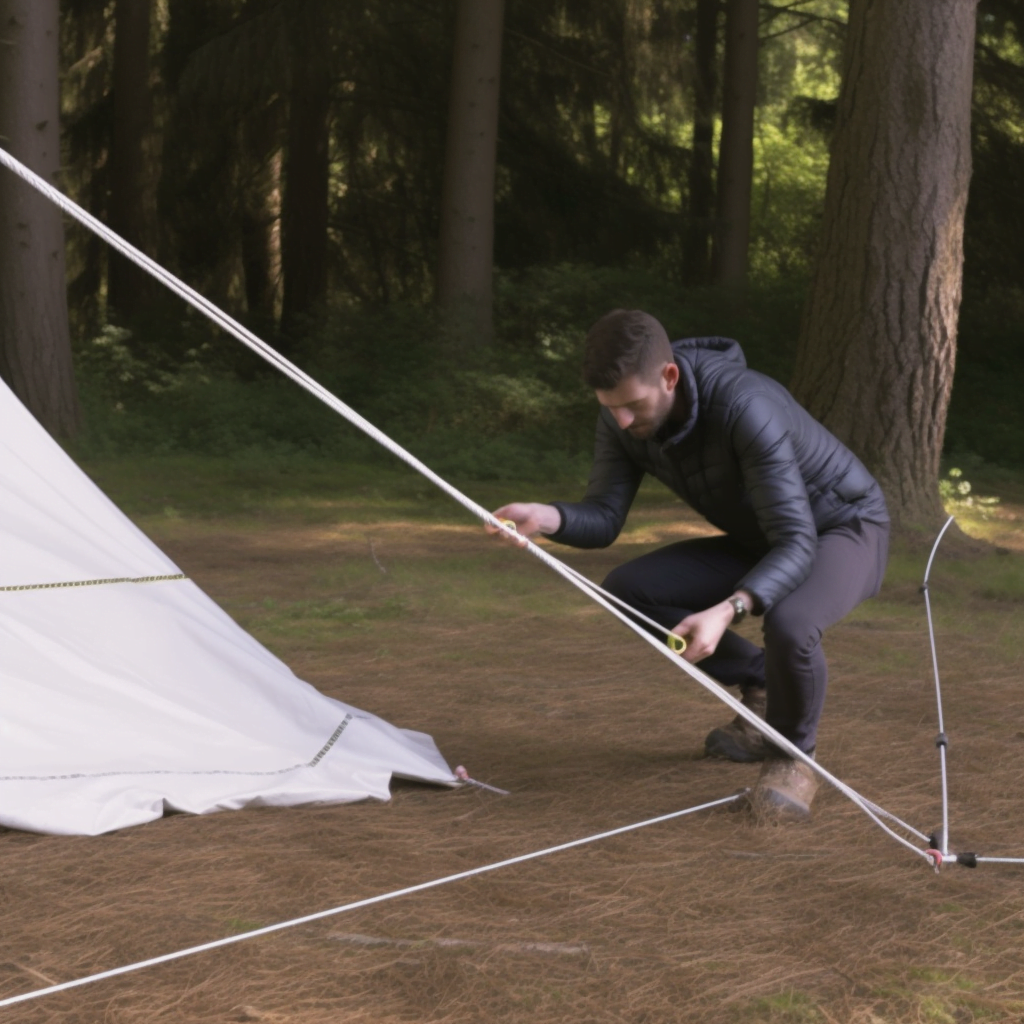
Stake the guy line ropes at a 45-degree angle, starting with the rope above the front door. The guy lines should extend straight out and off the tent seams, creating a symmetrical and sturdy structure.
Features of a Bell Tent: Rolling Up The Walls
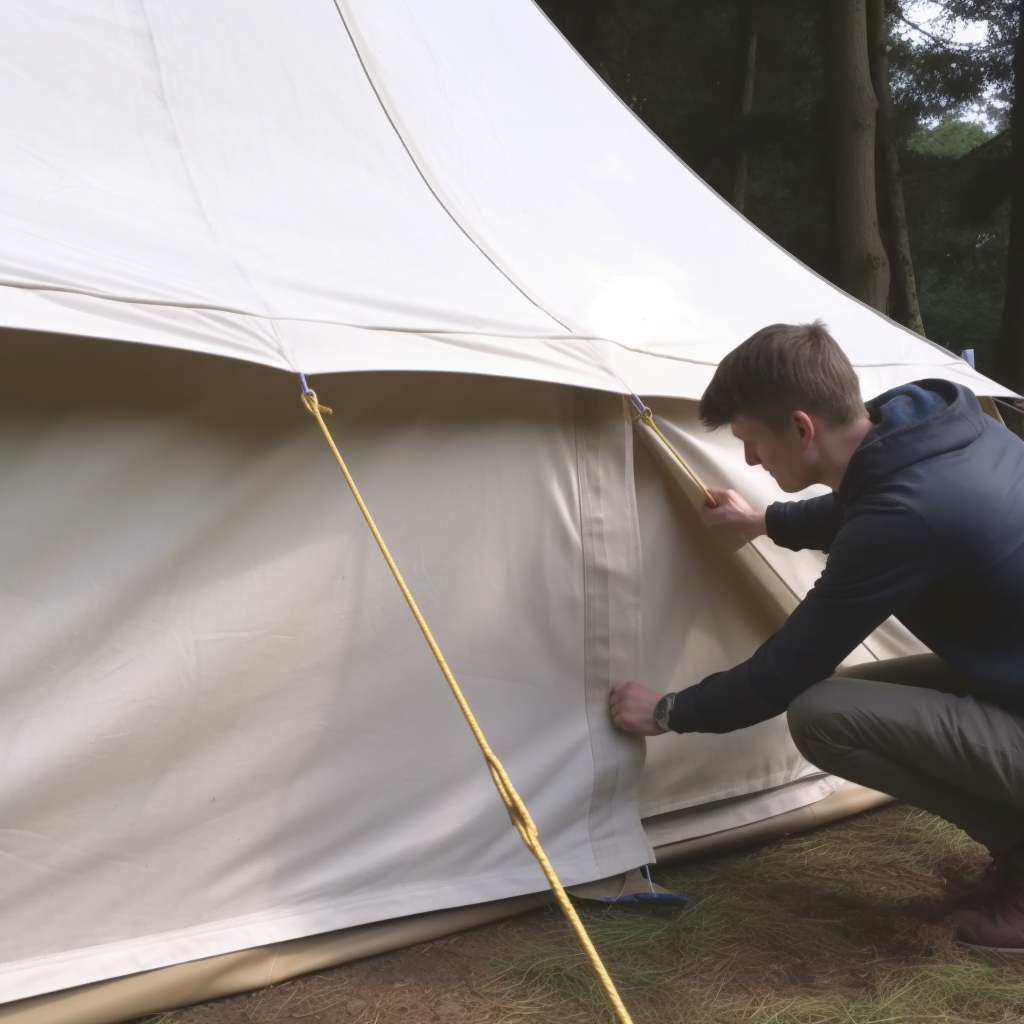
Many bell tents have a feature that allows you to roll up the walls for improved air circulation. To use this feature, undo the zipper around the base of the tent, tightly roll the wall upwards, and secure it using the attached string loops and toggles.
II. Steps for Folding a Bell Tent
Just as setting up a bell tent requires careful technique, so does taking it down. The process of folding a bell tent involves several steps, each of which contributes to the overall ease of storage and future setup. Here’s a step-by-step guide on how to properly fold your bell tent.
- Removing stakes, poles, and guy lines: Begin by extracting the stakes that secure the tent to the ground. It’s wise to have a dedicated storage bag for these to prevent loss. Proceed to detach the guy lines from the stakes, taking care to untie or unhook them from the tent. Finally, take down the central supporting pole and the A-frame pole at the entrance.
- Ensuring the tent is dry: This step is crucial. Before you start to fold the tent, make sure it’s completely dry. If it’s damp or wet, spread it out in the sun or a well-ventilated area to dry. Folding a moist tent can lead to mold and mildew growth, causing potential damage to the fabric and shortening its lifespan.
- Folding the tent in half lengthwise: With the tent spread out on a flat surface, smooth out any wrinkles or creases. Fold the tent in half lengthwise, aligning the entrance with the opposite side. Ensure there are no wrinkles or air pockets.
- Folding the tent in half again: Next, fold the tent in half widthwise. Your folded tent should now be a rectangle, with the entrance situated at one end.
- Rolling the tent tightly: Starting at the end opposite the entrance, roll the tent tightly and evenly towards the entrance. Try to keep the roll as compact as possible to save storage space and make transportation easier.
- Securing the tent with straps or ties: Once you have a neatly rolled tent, secure it with straps or ties to keep it from unraveling. Some bell tents come with their own straps or ties, but if yours doesn’t, you can use bungee cords or rope.
- Storing the tent in a dry, cool place: Store the folded tent in a dry, cool place, away from direct sunlight or extreme temperatures. This will help maintain the fabric and ensure the tent is in good condition for your next camping adventure.
III. Additional Tips for Folding a Bell Tent
Practicing your tent folding and unfolding before you embark on your camping trip will familiarize you with the process and make you more efficient. A groundsheet can be a valuable addition to your camping equipment, providing protection for your tent and making it easier to clean and fold. Always follow the manufacturer’s instructions for specific guidance on folding and storing your bell tent. Each brand may have its unique techniques or storage recommendations. Due to their size and weight, bell tents can be challenging to fold. Having at least two people to assist with the process can make it much easier and more efficient.
IV. Common Issues When Folding Bell Tents
Folding a bell tent can present some challenges. The size and weight of bell tents can make them difficult to fold and maneuver. Furthermore, if the correct folding technique is not followed, it can lead to damage or difficulty in setting up the tent for future use. Lastly, if the tent is not properly cleaned and dried before folding, it can cause mold, mildew, and fabric damage.
V. Solutions to Common Issues
Addressing these issues can significantly improve your bell tent folding experience. Enlisting the help of a friend or family member can make the folding process easier and more efficient. Always refer to the manufacturer’s instructions or seek out resources such as online tutorials to ensure you’re folding the tent correctly. Most importantly, take the time to